Requirements
- GitHub Account (GitHub)
- SSH Credentials
- FTP credentials
- During setup, it’s crucial to direct the FTP account to the root directory where your .NET project resides. This ensures that upon login, CI/CD land directly within the directory structure containing your project files. For instance, if your .NET project is stored in a directory named “/home/yourwebsite.com/public_html” on the server, configure the FTP account to start from this directory upon login.
Creating GitHub Action
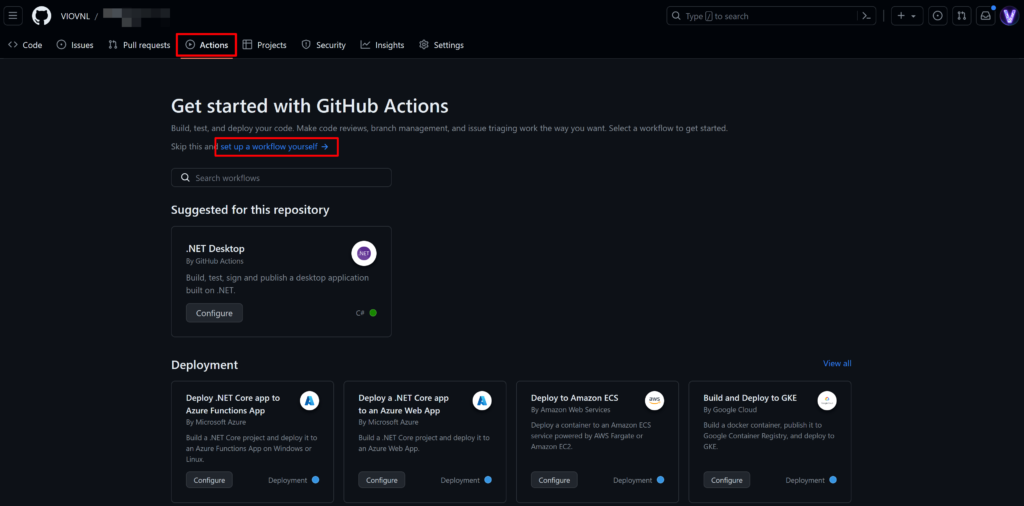
Step 1
Proceed to your GitHub repository hosting your .NET project and select the ‘Actions’ tab.
Step 2
Please copy and paste the following YAML code and adjust the settings as follows:
- Update ‘actions/checkout@v3’ with the latest available version.
- Update ‘actions/setup-dotnet@v3’ with the latest available version.
- Modify ‘dotnet-version’ to your projects dotnet version.
- Update ‘FTP-Deploy-Action@v4.3.4’ with the latest available version.
Please ensure that if newer versions are available in the future, they are applied accordingly.
# This workflow will build .NET project and sync it to FTP
name: 🟢 .NET Build & Sync Production
on:
  push:
    branches: [ "main" ]
jobs:
  build:
    runs-on: ubuntu-latest
    steps:
    - uses: actions/checkout@v3
    - name: ⏬ Setup .NET
      uses: actions/setup-dotnet@v3
      with:
        dotnet-version: 8.x
    - name: 🏗️ Restore dependencies
      run: dotnet restore
    - name: 🏭 Build
      run: dotnet build --configuration Release --no-restore
    - name: 📩 Publish to Release folder
      run: dotnet publish -c Release --output ./Release
    - name: 🏗️ Updating App Settings
      uses: microsoft/variable-substitution@v1
      with:
          files: './Release/appsettings.Production.json'
      env:
          ConnectionStrings.DbConnection: ${{ secrets.DB_CONNECTION }}
    - name: 📂 Sync files from Release folder to FTP
      uses: SamKirkland/FTP-Deploy-Action@v4.3.4
      with:
        server: ${{ secrets.FTP_IP }}
        username: ${{ secrets.FTP_USERNAME }}
        password: ${{ secrets.FTP_PASSWORD }}
        local-dir: ./Release/
        server-dir: ./
    - name: 🔍 Install SSHPass
      run: sudo apt-get install -y sshpass
    - name: 🕸️ SSH into server and restart service
      run: |
        sshpass -p "${{ secrets.SSH_PASSWORD }}" ssh -o StrictHostKeyChecking=no ${{ secrets.SSH_USERNAME }}@${{ secrets.SSH_IP }} "systemctl restart ${{ secrets.SERVICE_NAME}}.service"
Step 3
We need to create the required repository secrets, as specified in the provided YAML file.
- DB_CONNECTION
- Description: Connection string for the database.
- FTP_IP
- Description: IP address for the FTP server.
- FTP_USERNAME
- Description: Username for accessing the FTP server.
- FTP_PASSWORD
- Description: Password for accessing the FTP server.
- SSH_PASSWORD
- Description: Password for SSH authentication.
- SSH_USERNAME
- Description: Username for SSH authentication.
- SSH_IP
- Description: IP address of the SSH server.
- SERVICE_NAME
- Description: Name of the service/application.
To create GitHub project secrets, which are used to securely store sensitive information like API keys, passwords, and tokens, follow these steps:
- Navigate to your GitHub repository: Open your web browser and go to the GitHub repository where you want to add secrets.
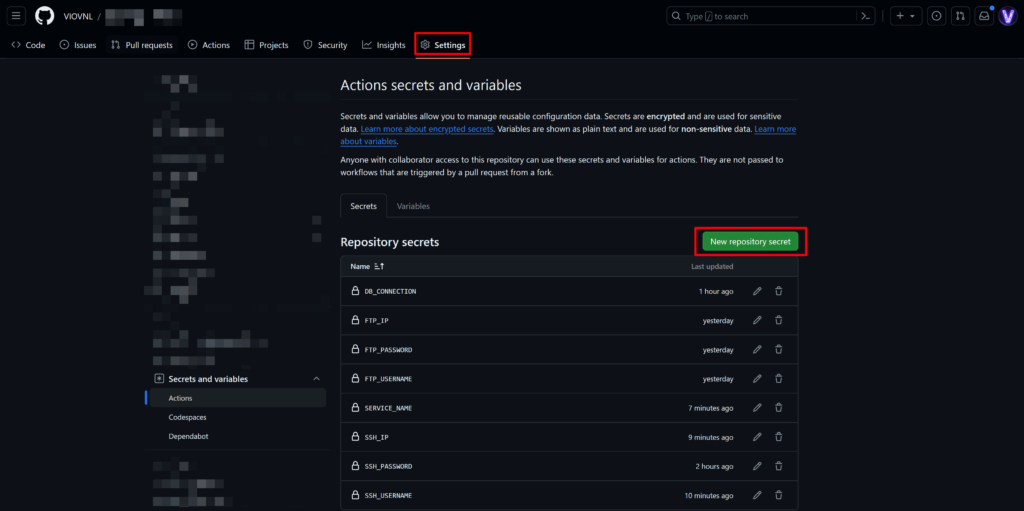
- Go to the Settings tab: Once you’re in your repository, find the “Settings” tab near the top-right corner of the page and click on it.
- Access the Secrets section: In the Settings menu, look for the “Secrets” or “Secrets & Keys” option in the left sidebar. Click on it to access the secrets management page.
- Add a new secret: On the Secrets page, you’ll see a button labeled “New repository secret” or similar. Click on it to begin adding a new secret.
- Enter the secret details: You’ll see two fields: “Name” and “Value”.
- In the “Name” field, enter a descriptive name for your secret, such as
API_KEYorPASSWORD. - In the “Value” field, paste the actual secret value. This could be an API key, password, or any sensitive information.
- In the “Name” field, enter a descriptive name for your secret, such as
- Save the secret: After entering the name and value of the secret, click the “Add secret” button to save it.
- Repeat if necessary: If you have multiple secrets to add, repeat the process by clicking the “New repository secret” button and entering the details for each one.